

Usually, when dealing with vacant homes, realtors have to furnish them first to make them look homey and worth buying. In such cases, many agents choose CGI over physical staging. The reason why they opt for virtual staging for real estate photos is that CG imagery is an effortless and fast solution. See for yourself, they don’t need to rent and transport the furniture, as well as hire movers, a staging agency and photographer. They simply take high-resolution photos of the home, send them to a virtual staging studio – and in just 48 hours the property is fully furnished and ready for sale!
On top of that, CGI technology is unlimited in terms of creativity. Real estate agents can request any kind of furnishings and decor for the project, as well as ask 3D artists to replace objects or change colors and textures. With virtual staging, such adjustments are easy to make and don’t take long.
But how exactly do CG stagers do their magic? Well, it all happens in 5 simple steps, and we have the whole process explained for you in this article. Read on!
#1. Getting and Submitting a Scope of Work

The process of creating virtual staging for real estate photos begins with a scope of work that a realtor sends us. The brief should contain all important data on the project – high-resolution photos, style references/ mood boards, text descriptions, 2D drawings, etc. All in all, the more information on real estate, the easier it is for CG artists to make virtual staging.
According to our policy, the scope of work is checked by our project manager. If it turns out that there is not enough information for a digital staging project, then a PM requests additional data from a real estate agent. Once it’s all sorted out, a PM submits the brief and a CG team proceeds to the next step.
#2. Selecting Furniture and Accessories from a 3D Library

To do top-notch virtual staging for real estate photos, CG artists choose furnishings and decor that compliment the interior. Together with a realtor or on their own, they go through our database of 3D models. This library has more than 6 500 ready-made furniture sets and 50 000 individual 3D objects all sorted by style, color, and purpose.
Once CG artists pick the set for their future virtual design, they additionally adjust the textures and colors of all objects. This way furniture and decor will match the overall color scheme of a room and meet the realtor’s requirements. All the alterations are made in 3D software and usually take just a couple of clicks.
#3. Building a Copy of Real Estate in 3D Software

As soon as a CG team finds suitable furniture combinations, it’s time to prepare the scene for virtual staging. For that, they recreate rooms of the real estate in 3D software. The point here is not to copy it from photos down to the smallest detail but to build a 3D space in correct proportions, with all window cells and doorways. Why is it so necessary?
The thing is, such a 3D box is meant to simulate the original environment so that furniture 3D sets look realistic when rendered inside of it. If a 3D room mimics the original interior from photos and light falls in the very same way, all objects cast shadows of accurate shapes. A furniture set rendered in such a 3D box will look 100% realistic when added to original real estate photos.
#4. Setting Up the 3D Rendering Process

Before proceeding directly to the rendering process, CG stagers adjust the light settings to match original ones from the photo up to the temperature and the brightness of the light. Then they install 3D cameras that precisely repeat the horizon line from the house pictures to get the same perspective.
Again, the point of doing virtual staging for real estate photos is to make all added objects look realistic. Once cameras and lights are all set up, CG artists press the render button and wait for resulting 3D visualizations. After rendering, it’s time for advanced post-production.
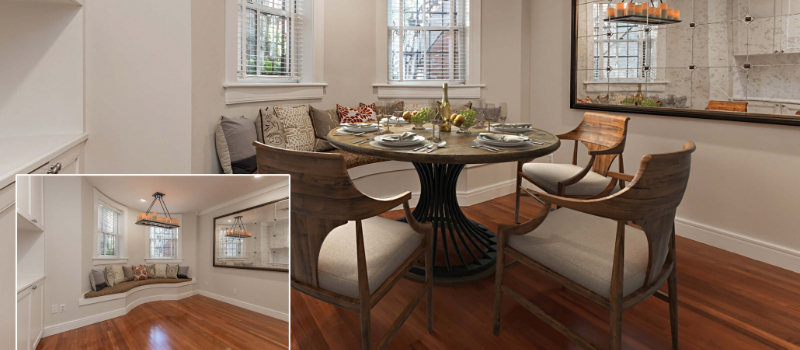
#5. Adding Rendered Furniture Sets to Real Estate Photos
-

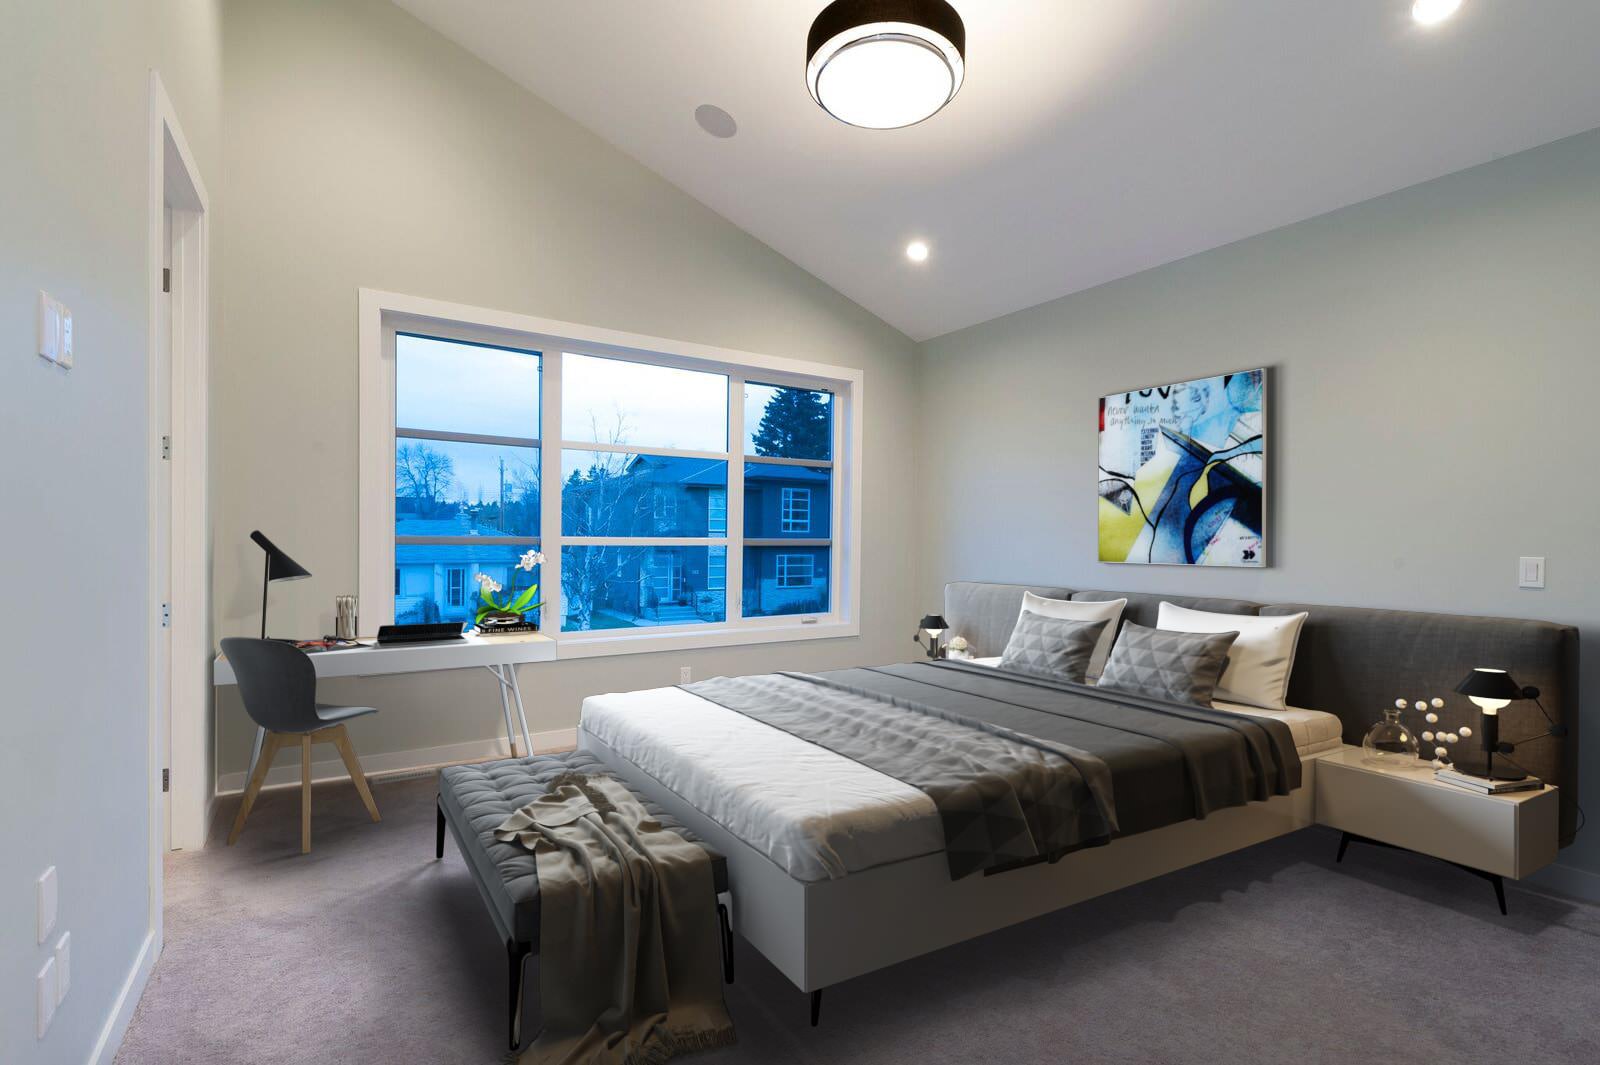
Empty Space Virtual Staging For A Cozy Bedroom Furnished Bedroom
Post-production is a necessary stage of virtual staging for real estate photos. Using a graphic editor, CG artists cut out the rendered objects from the 3D visualization and paste them into the original picture. If the camera and light settings were correct, then the furniture set already looks natural in the photo.
But of course, professional CG artists don’t stop there. They continue post-processing a photo by smoothing out the edges of the added pieces, darkening or lightening them up, adjusting the color balance and brightness, and such. As you can see in the illustration above, in the end, they get stunningly realistic virtual staging that is simply indistinguishable from real estate photos.
Like any other project, virtual staging for real estate photos starts with a detailed scope of work. After it’s submitted, CG artists select furniture and decor 3D models based on references and the task. Then CG experts recreate the space in 3D software with correct light and camera settings, fill it with 3D furnishings and render the scene. To make rendered furniture pieces magically appear in original photos, CG stagers use a graphic editor. They cut objects from the 3D visualization and add them to real estate pics. With a little post-production magic, the final home images look as they were physically staged and photographed!
Ready to try digital staging for your properties? Contact us for virtual staging services right now, and get photorealistic home transformation in just 48 hours!


Leave a Reply
Want to join the discussion?Feel free to contribute!